Task 1 - Upload your documents
CoCounsel turns a pile of documents into a clear story.
- In CoCounsel chat, click Upload - Files from your device.
- Select the case files you'll use for your project.
- When the documents appear in the chat, continue to Task 2.
Tip: Keep all work for this assignment in the same CoCounsel Chat so you can return and reuse the same record set.

Task 2 - Summarize the record
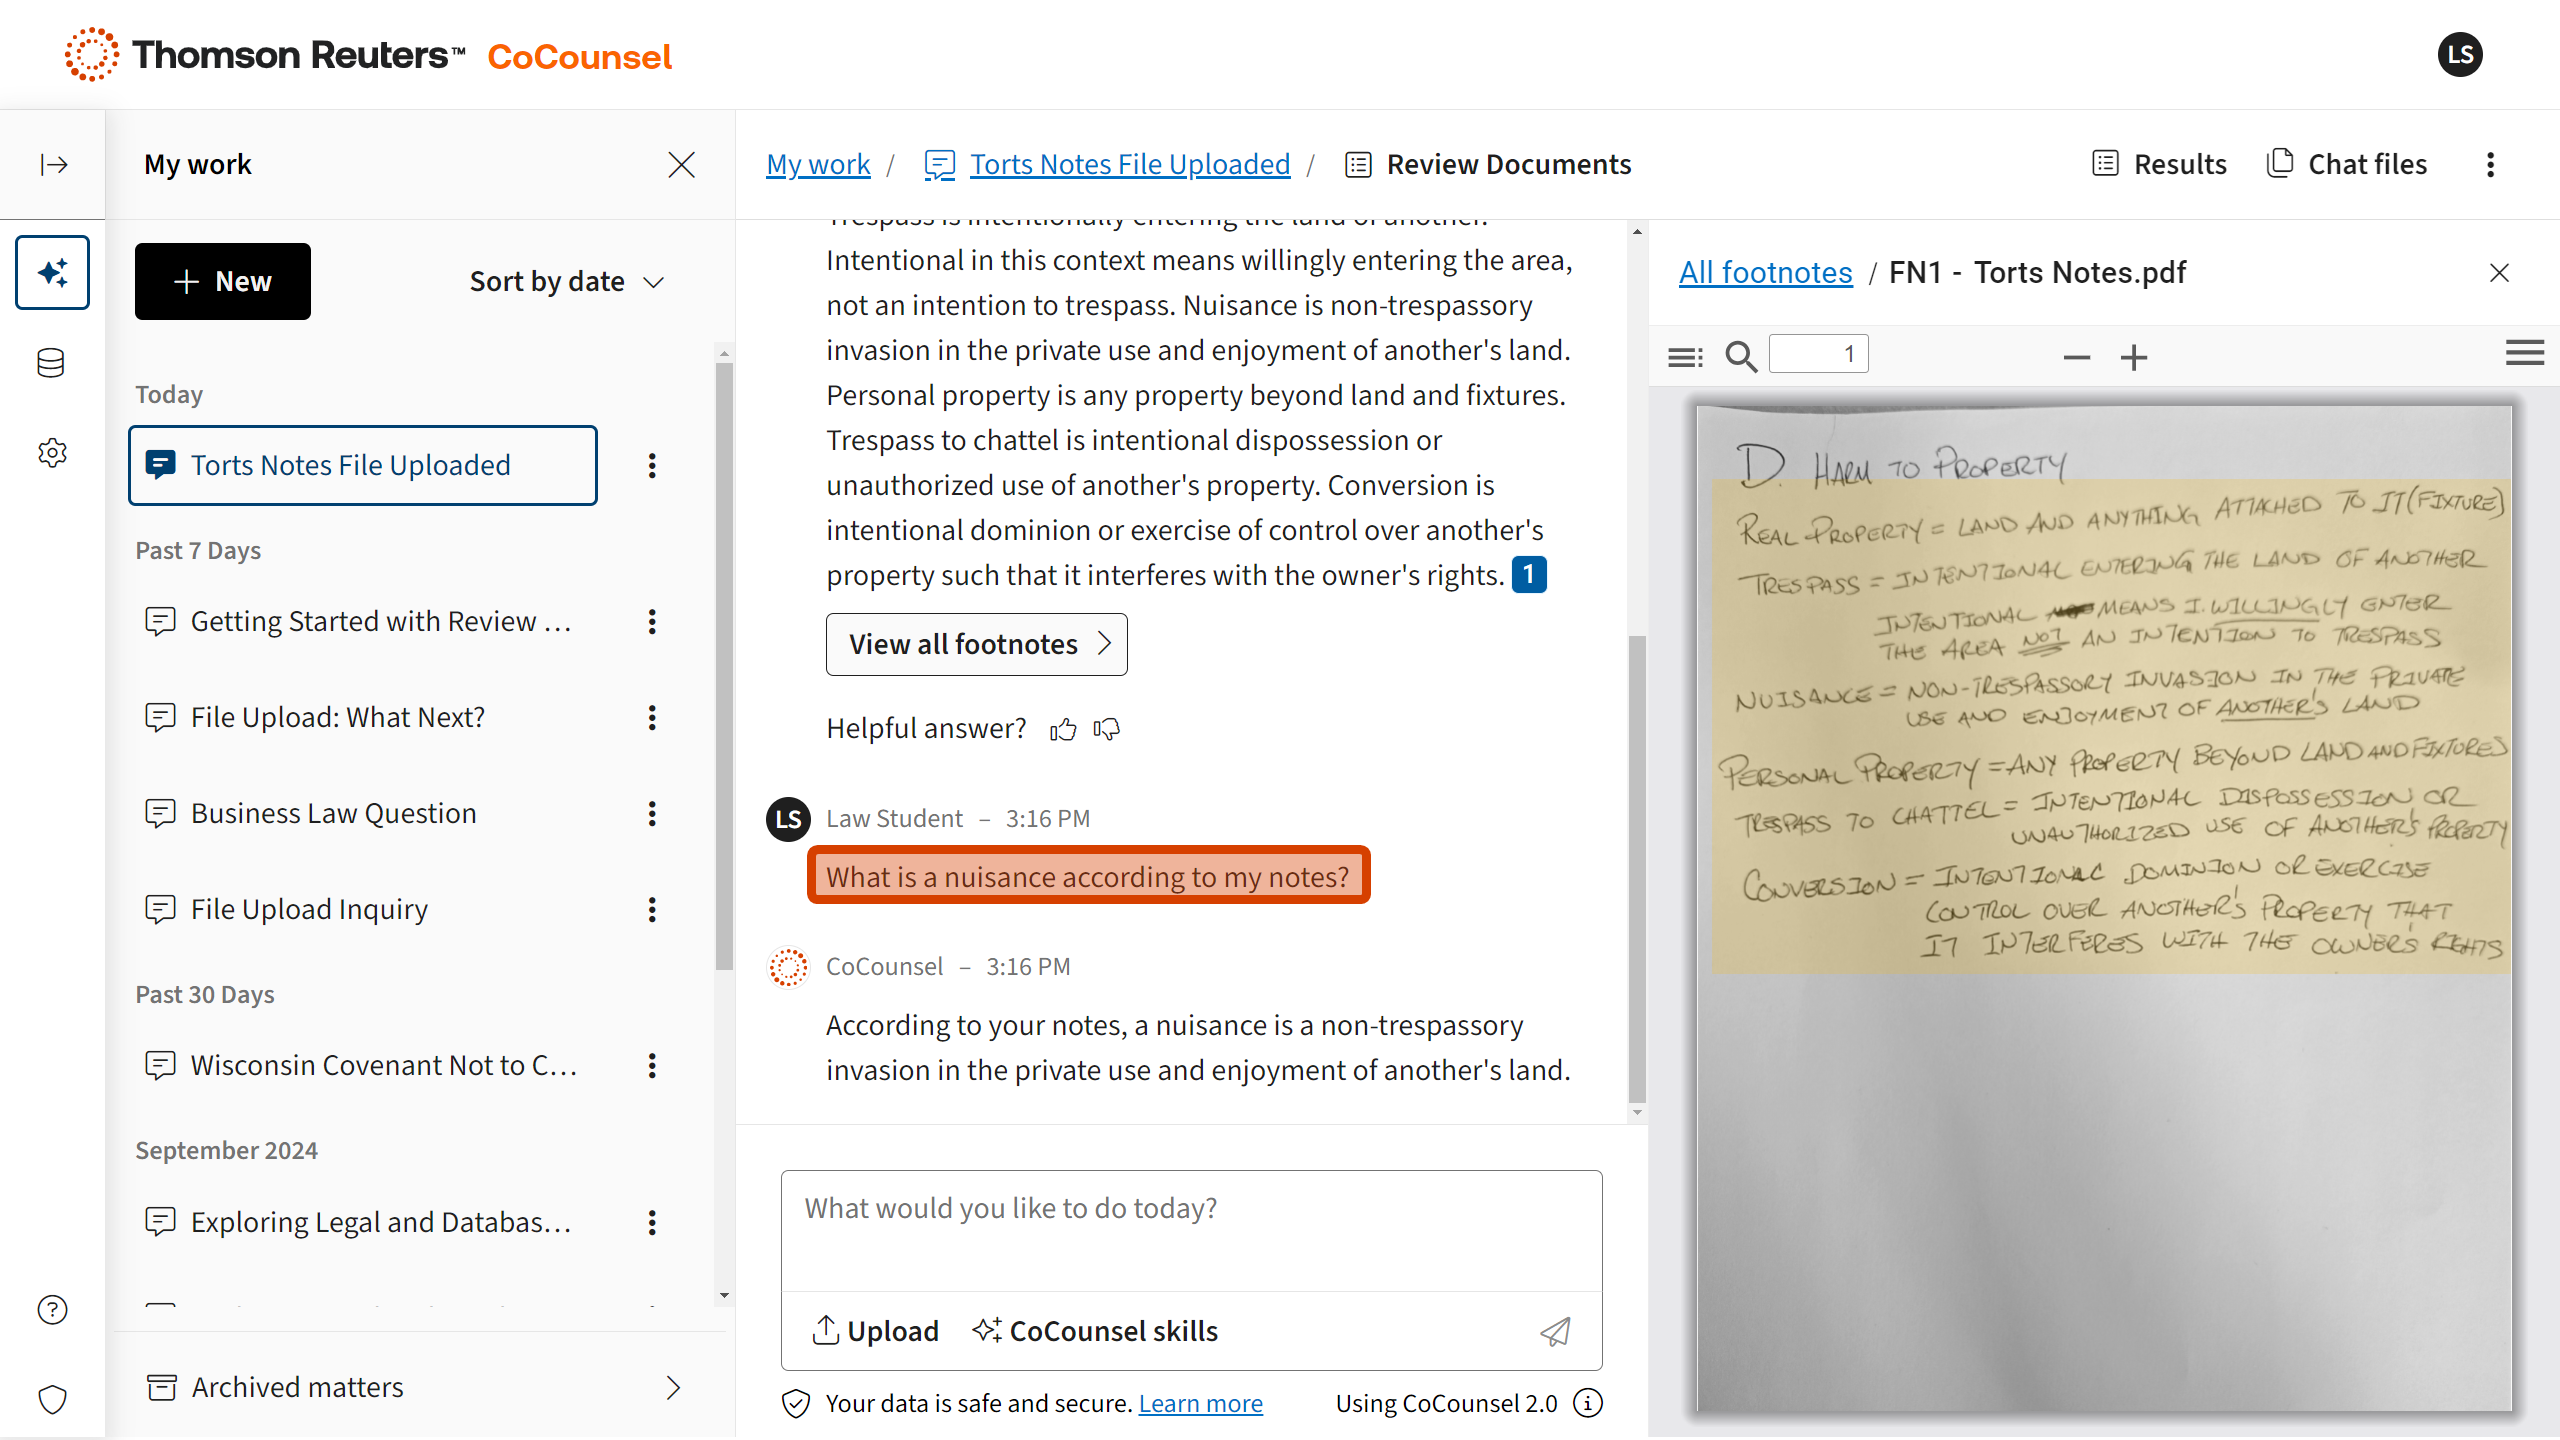
CoCounsel creates a facts + procedural posture summary from your uploaded files with footnotes to the record and clickable links to verify authority in Westlaw.
- In CoCounsel chat, request a targeted summary (e.g., "Summarize the procedural history and key facts relevant to Issue 1.")
- Review the summary and open the footnotes to confirm facts in your uploaded documents.
- Open linked citations in Westlaw to verify authority.
- Continue to Task 3
Tip: Be specific. Don't ask for everything all at once. (e.g., "Summarize the disputed facts for Issue #1")

Task 3 - Build a Case Timeline
The Timeline Skill organizes key facts from your uploaded files and puts them in date order - helpful for writing your Case/Facts section and spotting missing dates or unclear points before you start your research.
- In chat, ask for a focused timeline, (e.g., "Create a timeline of events specific to Issue 1 and create a chart.")
- Review and open footnotes to confirm key dates in your uploaded documents.
- Open linked citations in Westlaw to verify authority.
Now you're ready to conduct informed legal research!

STEP 2:
Find Authority
Accelerate Your Research Workflow
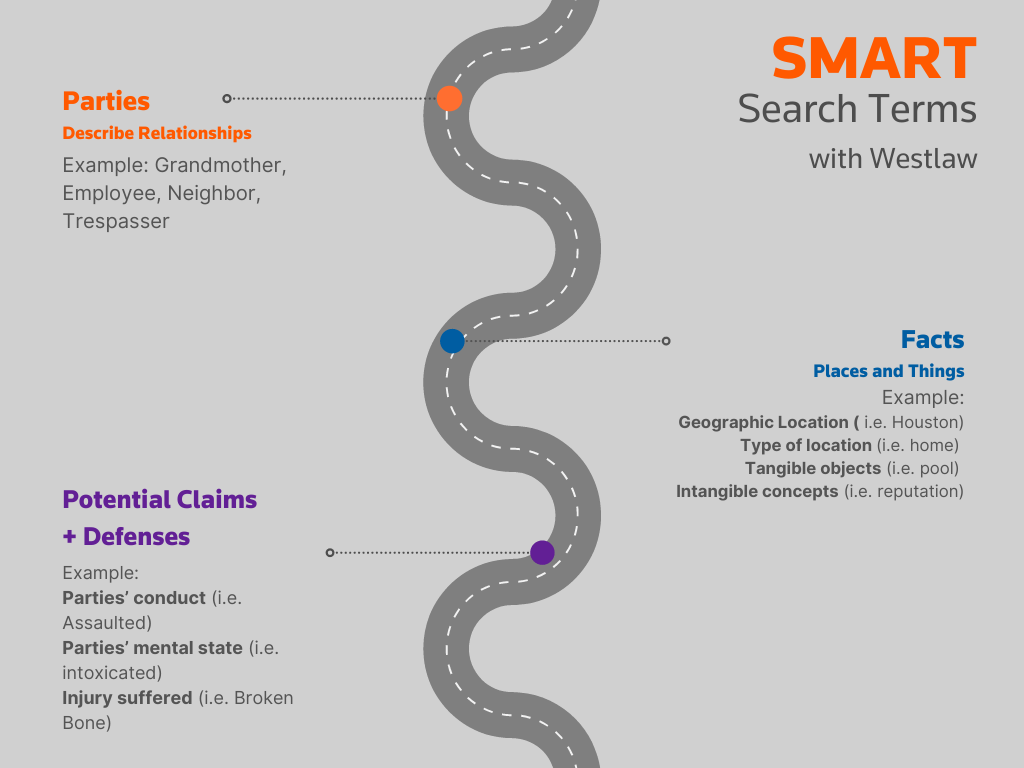
- Orient: Use Deep Research to quickly map key issues, terms and rules.
- Verify: Instantly confirm your findings in Westlaw.
- Examine: Explore secondary sources to master the doctrine.
- Finalize: Move into primary law to read and cite controlling authority.
Output you want: The leading cases + how courts apply the test
Skip the pitfall: Reading 20 cases without an organizing rule

STEP 3:
Find Examples
Bypass blank screen anxiety by looking at real filings, using professional templates, and checking the rules you must follow. Use these examples from Westlaw Advantage and Practical Law to move past your blinking cursor.
Which should I pick?
Need real-world models? Use Trial Court Documents
Need Structure fast? Start with Standard Documents
Need requirements? Use KeyRules

Trial Court Documents
Learn from the hard work of real attorneys by viewing Trial Court Documents on Westlaw. Use these real-life example motions, briefs, and pleadings to jumpstart your drafting process.

Standard Documents
Refer to Standard Documents on Practical Law for expert legal guidance on how to prepare motions and pleadings. Filter by jurisdiction and get started with an on-point, example for your assignment.

KeyRules
Everything you need to know for filing in local, state, and federal courts. Use KeyRules on Westlaw to understand rules and procedures for formatting and filing different types of pleadings and motions.

STEP 4:
Draft Your Argument
You've found the law, now turn it into analysis. Watch this short video for practical writing guidance on topics like rule synthesis, application of key facts, and how to structure and draft the argument section.
STEP 5:
Check Your Work
(before you turn it in)
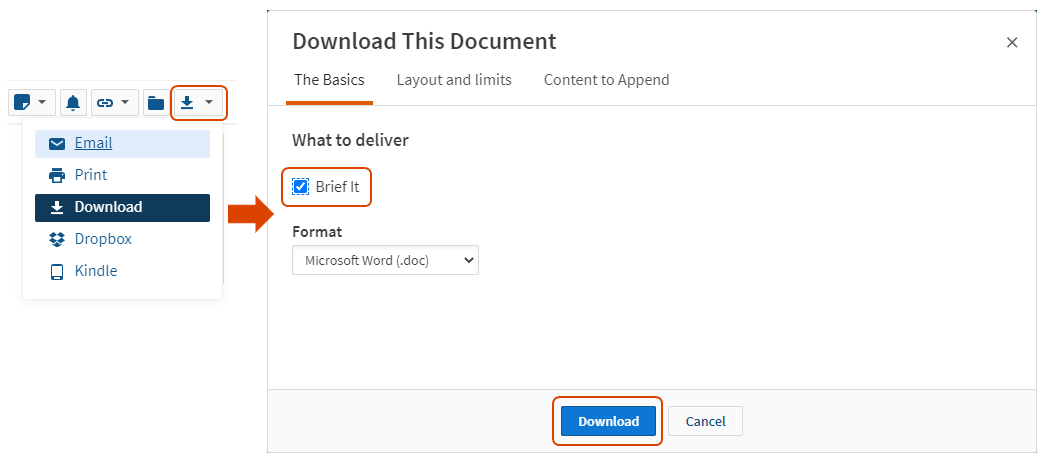
Catch easy-to-miss issues that can cost points. Upload your draft brief to Litigation Document Analyzer to check citations, flag possible misstatements of law, pressure-test your argument, and surface counter-arguments with supporting authority.
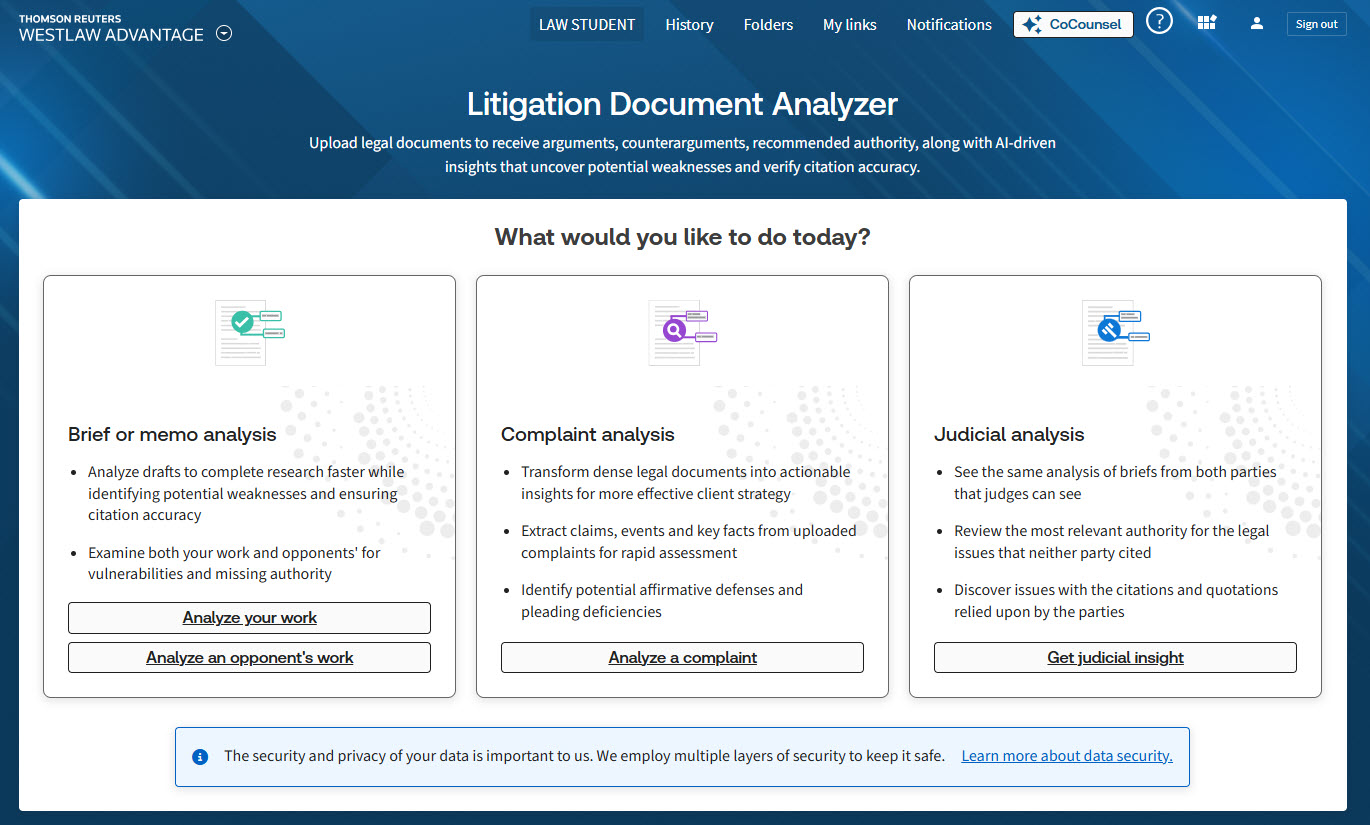
Upload your document to LDA
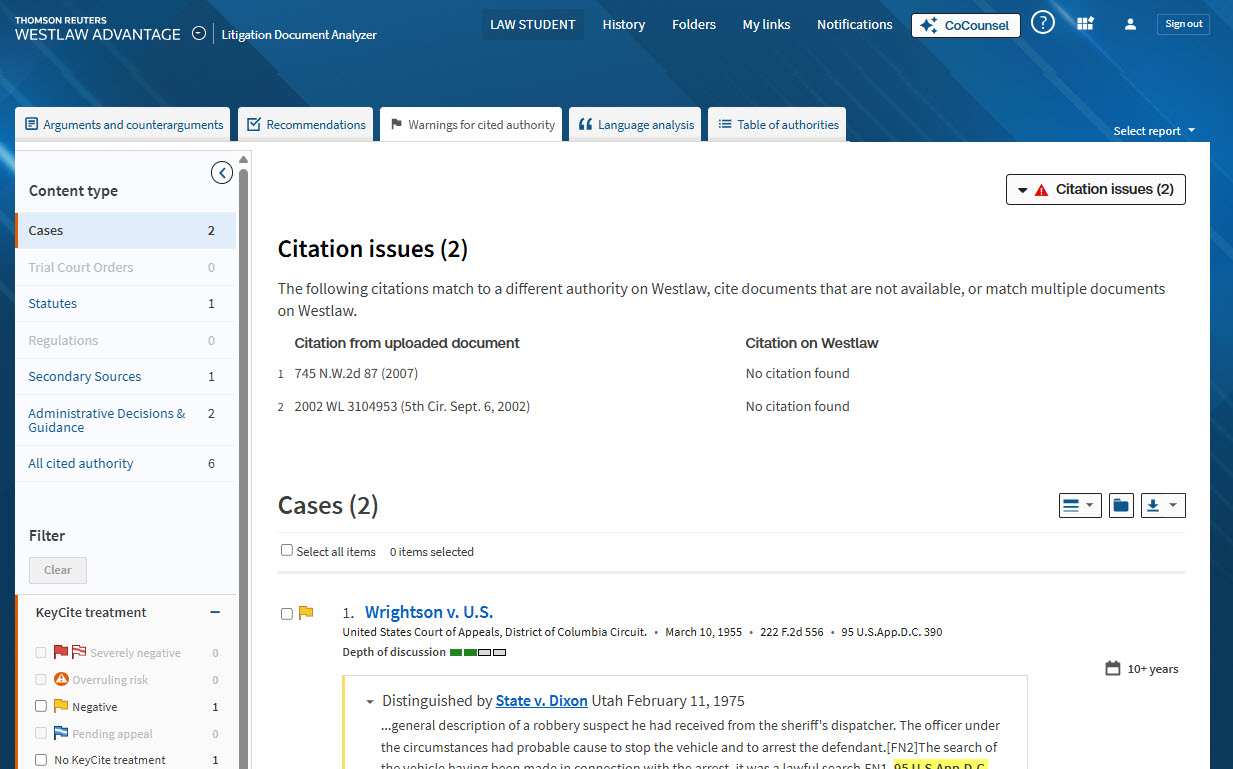
See warnings for cited authority
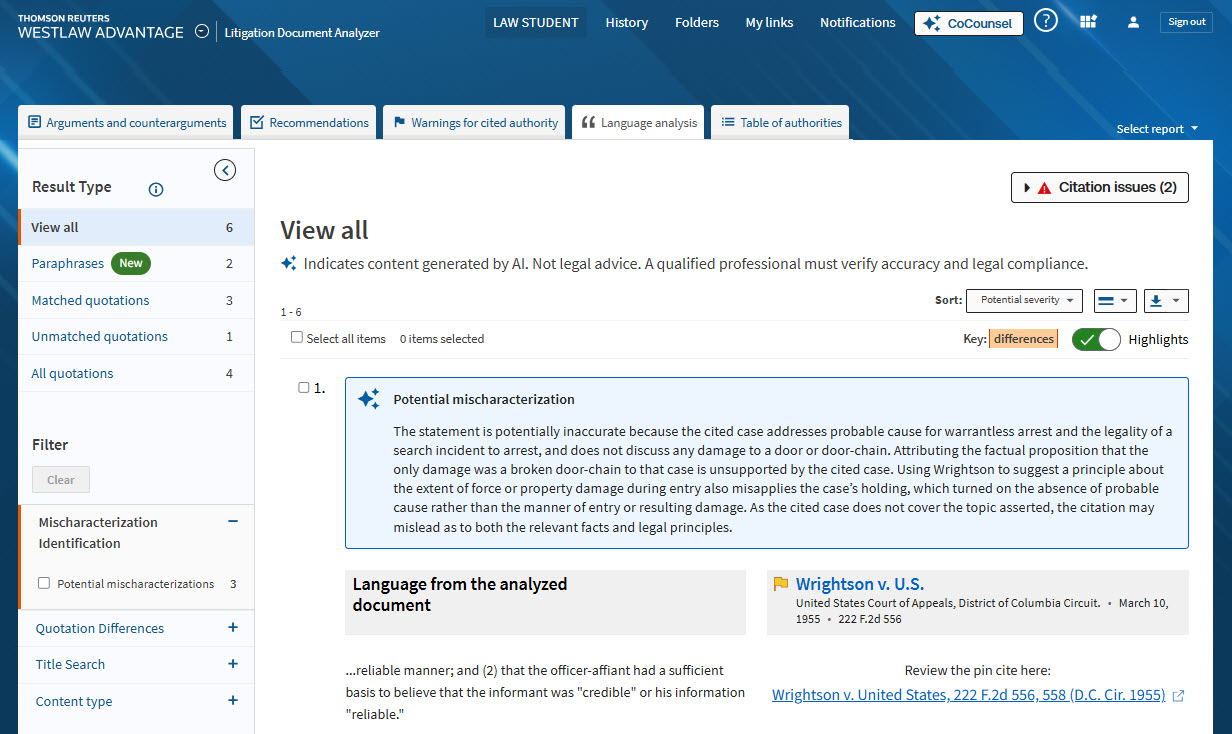
Spot misquotes & mischaracterizations
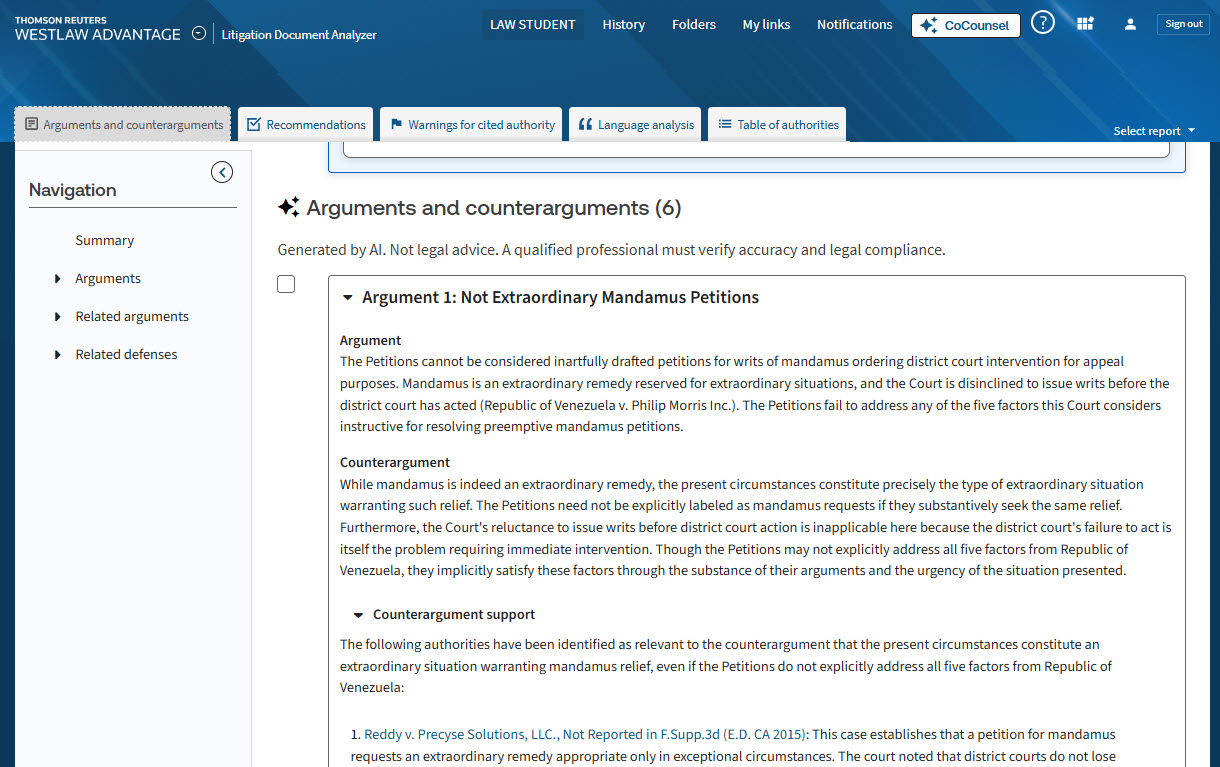
Get counterarguments & their authority
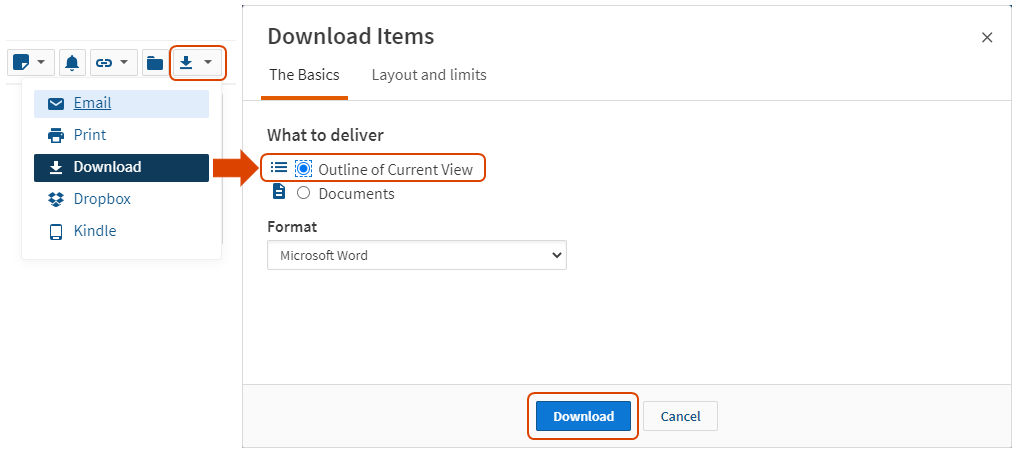
Don't build your table of authorities from scratch.
Do in minutes what could take you hours.
Save time on formatting and those finishing touches
with Westlaw's Table of Authorities (TOA) Builder.
STEP 6:
Prepare Your Oral Argument
Help your narrative come to life from the paper to the podium with the following resources from Westlaw and Practical Law.